

A Guide to Post Renovation Cleanup for Workplaces

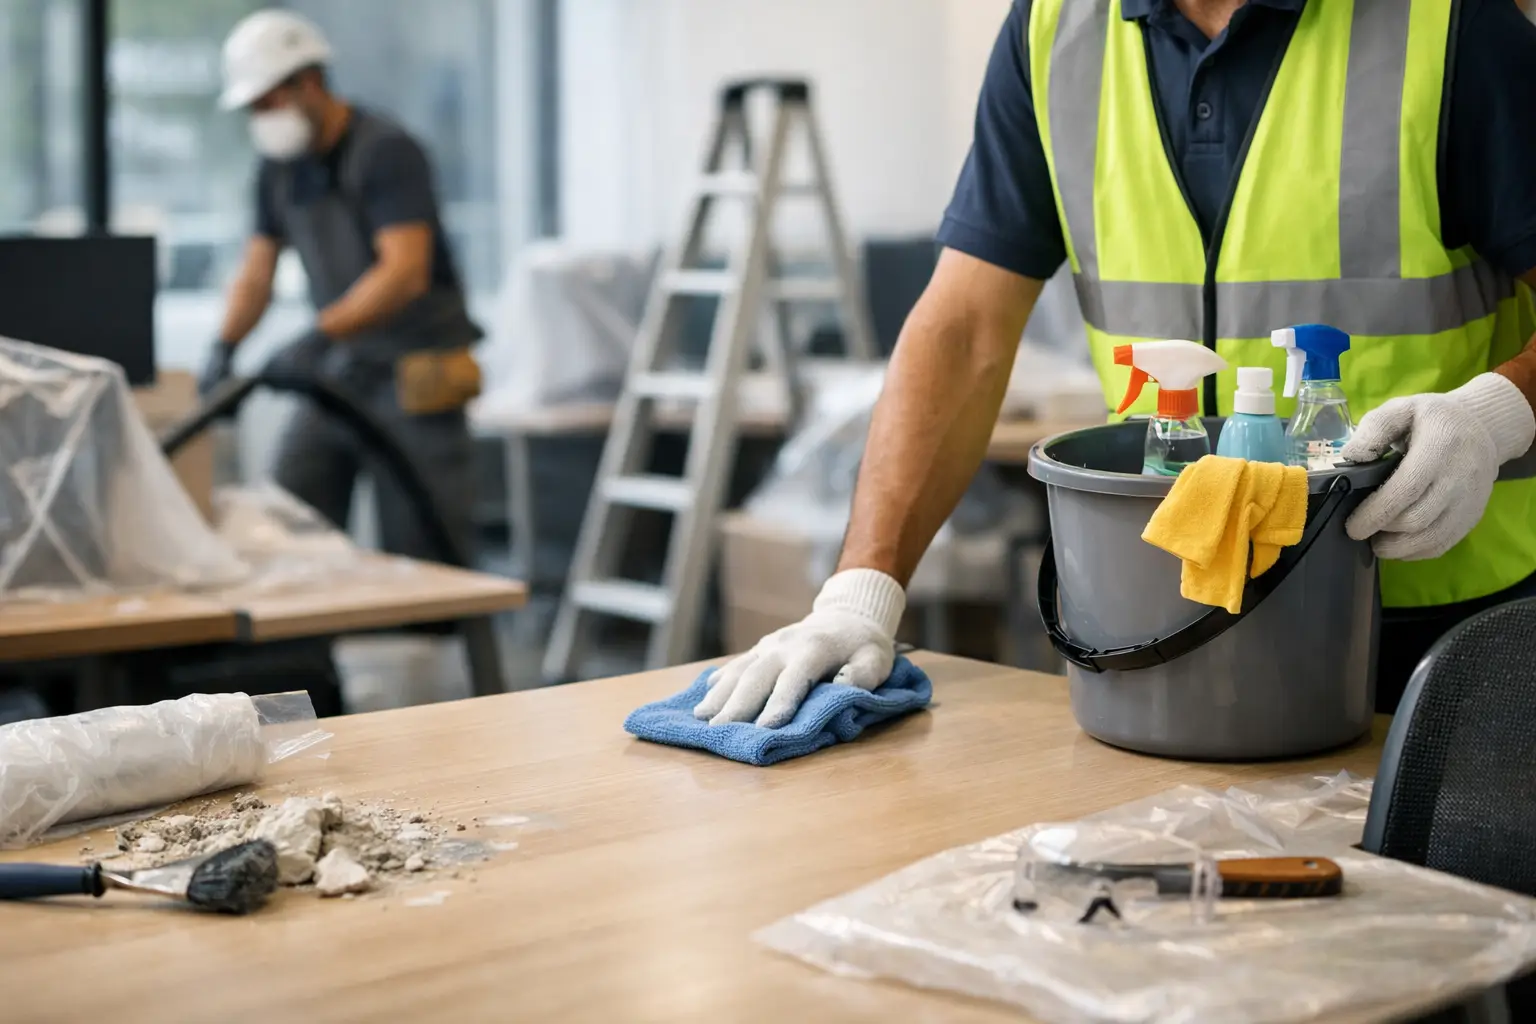
Fresh paint and new finishes can make a workplace look ready for business. Fine drywall dust on vents, adhesive residue on glass, and debris tucked beneath fixtures can tell a different story. This guide to post renovation cleanup explains how facility teams can move from construction turnover to a clean, healthy, customer-ready space without overlooking the details that affect indoor air quality, safety, and first impressions.
Post-renovation cleaning is not the same as a routine janitorial visit. Construction work creates dust that travels through air returns, settles on high ledges, and collects inside areas that are easy to miss during a quick walkthrough. A proper cleanup plan accounts for the type of renovation, the building’s occupancy schedule, and the condition required before employees, tenants, customers, or inspectors arrive.
Start With a Detailed Turnover Inspection
Before cleaning begins, inspect the site with the contractor, project manager, or property representative. This step prevents confusion about what construction crews are responsible for removing and what belongs in the cleaning scope. Large debris, leftover materials, tools, and hazardous waste should be removed before a cleaning crew begins detailed work.
Walk every room, including storage areas, washrooms, mechanical closets, entrances, and exterior access points. Look beyond the obvious. Dust often settles on door frames, sprinkler heads, light fixtures, window tracks, baseboards, blinds, shelving, and the tops of cabinets. In commercial spaces, it can also collect on workstations, point-of-sale equipment, display fixtures, and ventilation grilles.
Document unfinished items, damaged finishes, or surfaces that require special care. A cleaning team should not try to remove paint overspray from a delicate surface or scrape adhesive from glass without confirming the right method. The goal is a clean site, not an avoidable repair bill.
Plan the Cleanup in the Right Order
The most effective post-renovation cleaning follows a top-to-bottom, dry-to-wet sequence. Cleaning floors first only creates more work when dust falls from ceilings, vents, and high surfaces afterward. A coordinated sequence also helps teams control dust instead of moving it from one area to another.
Remove construction debris before detail cleaning
Start by clearing approved debris, packaging, protective coverings, and disposable materials. Vacuum loose dust with commercial-grade equipment fitted with appropriate filtration. Dry sweeping is usually a poor choice because it can send fine particles back into the air.
Once debris is removed, clean high surfaces first. This includes ceiling fixtures, ledges, vents, upper shelving, door tops, and wall surfaces. Microfiber cloths and controlled vacuuming are often more effective than aggressive wiping, especially on freshly painted walls or newly installed finishes.
Clean horizontal surfaces and touchpoints
After high dusting, clean counters, desks, shelving, cabinets, windowsills, doors, and trim. Pay close attention to handles, switches, railings, faucets, elevator buttons, and other frequent touchpoints. These areas may have construction residue as well as fingerprints from tradespeople moving through the site.
Use products suited to each surface. New stone, wood, stainless steel, glass, vinyl, and painted finishes can react differently to cleaners. Harsh chemicals may dull a finish, strip a protective coating, or leave streaks that are highly visible under new lighting. Health-conscious cleaning also means selecting approved products and using them according to label directions.
Finish with floors, glass, and final presentation details
Floors are the final major stage because they collect dust throughout the process. Vacuum carpets thoroughly, including edges and corners. Hard flooring may need vacuuming, damp mopping, and spot treatment for paint drips, grout haze, tape residue, or footprints. The correct approach depends on the floor type and whether it is newly installed.
Glass should be cleaned only after nearby dusty work is complete. Remove labels, adhesive residue, smudges, and dust from interior glass, entry doors, partitions, mirrors, and display cases. Clean, streak-free glass makes a noticeable difference in offices, retail spaces, dealerships, and restaurants where presentation directly shapes customer perception.
Treat Dust Control as a Health and Operations Issue
Post-renovation dust is more than a cosmetic concern. Fine particles can affect indoor air quality, trigger discomfort for sensitive employees and visitors, and settle again after a space appears clean. In a workplace that opens immediately after construction, that can lead to complaints, extra cleaning costs, and an unprofessional first day.
Pay particular attention to HVAC registers, returns, diffusers, and nearby surfaces. A cleaning team can remove accessible dust from grilles and surrounding areas, but heavily contaminated ducts may require a separate assessment by an appropriate specialist. It depends on the scope of construction, whether the system operated during the work, and how much dust entered the ventilation system.
If the building will be occupied soon, consider scheduling cleaning in phases. An initial construction cleanup removes bulk dust and debris. A final detailed clean takes place after contractors complete touch-ups, furniture installation, and final inspections. For larger projects, a short follow-up visit after occupancy can address dust that settles after the first few days.
Do Not Overlook Washrooms, Kitchens, and Customer-Facing Areas
High-use areas need a more careful standard because they affect hygiene, comfort, and business reputation. Washrooms should be cleaned and disinfected from top to bottom, including fixtures, partitions, dispensers, tile, drains, mirrors, and floors. Check that construction dust has not collected in exhaust vents or around plumbing connections.
In staff kitchens, break rooms, and restaurant service areas, remove dust from cabinetry, appliances, counters, sinks, and shelving before disinfecting food-contact-adjacent surfaces as appropriate. Cleaning should be completed before supplies, food, dishes, or equipment are put away. This avoids trapping dust behind newly stocked items.
Reception areas, showrooms, sales floors, and lobbies deserve a final presentation check. These are the spaces visitors notice first. Clean entry glass, flooring, seating, signage, display surfaces, and corners around doors. A renovated location should feel finished from the moment someone walks in, not like a project that was rushed across the finish line.
Know When Specialized Cleaning Is Needed
Not every renovation requires the same level of service. A small office refresh may need detailed dust removal, washroom cleaning, floor care, and final touchpoint disinfection. A full commercial build-out may require multiple cleaners, specialized equipment, phased scheduling, and coordination with contractors and building management.
Some conditions call for additional caution. Mold, sewage backup, suspected asbestos-containing material, lead-based paint, chemical spills, or sharps should not be handled as routine post-construction debris. These situations require properly qualified professionals and a documented safety approach.
Carpet, upholstery, and floor finishes may also need specialized care after renovation. Fine dust can work deep into carpet fibers, while new hard floors can be vulnerable to the wrong pad, chemical, or moisture level. Ask the flooring manufacturer or installer about recommended cleaning methods before using intensive treatments.
Use a Final Quality-Control Walkthrough
A final walkthrough is where a cleanup plan becomes an operational handoff. Inspect the space under normal lighting and from the perspective of someone entering for the first time. Open cabinet doors, check window tracks, look behind doors, and run a clean hand across high ledges and horizontal surfaces.
Confirm that waste has been removed, floors are dry, access paths are clear, and no cleaning supplies or equipment remain behind. Check for streaks on glass, residue on fixtures, dust on vents, and missed corners. In customer-facing environments, also confirm that the space is ready for merchandising, furniture placement, or opening procedures.
For property managers and facility teams, keeping a simple sign-off record is useful. It creates accountability, clarifies what was completed, and gives tenants or business owners confidence that the space was prepared to an agreed standard.
Choose a Cleaning Partner That Can Work Around the Project
Post-renovation schedules rarely stay perfectly predictable. Contractors may need an extra day, final inspections may shift, or a tenant may need the space ready before regular business hours. A professional cleaning partner should be able to adjust the scope, staff the project appropriately, and coordinate around other trades without compromising safety.
Look for a bonded and insured provider with experience in commercial environments, supervised teams, and cleaning products that support a healthy workplace. Clear communication matters just as much as equipment. The provider should understand which areas need a final polish, which surfaces require special handling, and when a second cleaning phase will deliver a better result.
A renovated workplace deserves more than a quick sweep before opening. With a careful inspection, controlled dust removal, surface-specific cleaning, and a final quality check, the space can begin its next chapter looking clean, feeling healthy, and ready to support the people who use it every day.

About Author

Recent Posts
Property Turnover Cleaning That Protects Move-In Dates

8 Insured Commercial Cleaning Benefits for Businesses